please dont laugh this was my first attempt at making a comb. (made on january 12th 2008 this tuitorial was in the
archives of lhc)
january 12th 2008 when i woke up i knew that i wanted to try to make a comb so i went to the
art supply store and bought 2$ worth of wood.
i wanted the comb to be a wide tooth comb that was smooth and useful for
detangling dry hair. i wont put a fine tooth comb anywhere near my hair so I set to work trying to make it as functional and
beautiful as possible.
first i marked my pattern on the wood and colored in the areas that were to be cut out... i decided
that it would be easier to cut out the teeth first.
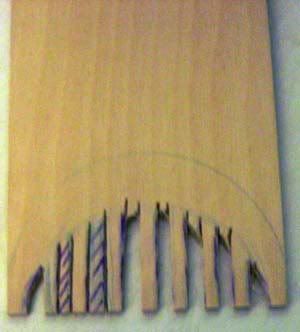
as you can see the comb is still attached to the bigger piece of wood.
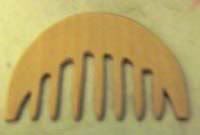
i then sanded sanded sanded and then sanded
some more until the teeth were pointed and it was smooth in between them... only then did i cut the comb out from the big
piece of wood
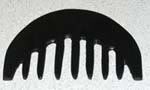
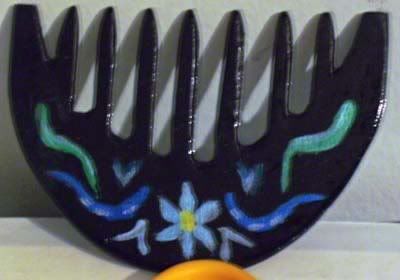
i decided to paint the comb a mettalic black.. i beleive this was a mistake because staining it would have been much easier.
i then painted in mettalic paints some simple designs that i did freehand in less that 2 minutes. i painted 2 different
designs i then coated it with gloss sealer..
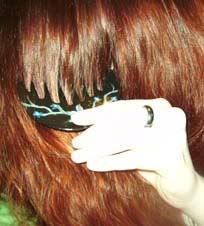
i wasnt sure just how you wanted me to take a pic of the comb in action but here goes.
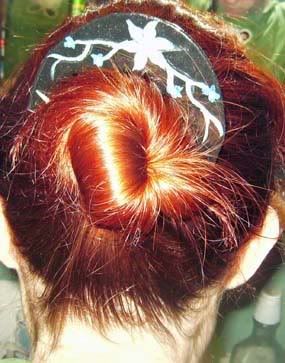
here is the other side of the comb

here is me being silly and sticking the comb in my hair
its hard to photograph this comb because all of the paint is mettalic including the black not to mention that it keeps
showing up white in my pics because of the shinyness of the comb.
if you are confused or have questions please ask in my guest book or send me a pm at lhc