|
ok so measure out your stick... mark all the way around with perminant marker. with this stick im not really giving you
measurements because you already know the basics from the carved stick page and only you know how long a stick is right for
your hair. so lets begin.
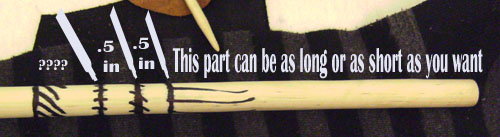
ok now take your cylinder type rasp file thingy and SLOWLY carve out the areas that i've shown
in the picture, turning the dowel as you carve to get it even on all sides. with the 36 inch dowel
you can hold it still mostly with your feet while one hand turns it and the other hand carves. now i'm sure that you noticed
that i outlined the edge of the area that's going to be shaved down completely..that is to keep that edge a clean line which
you can't really do with the bigger rougher rasp thingys. remember to follow the lines carefully and go slow. you dont actually
need to have the top of the stick look like mine you can be creative with the top on this one really make it your own. and
because i want you to be creative im not posting pictures of the steps for carving the top... ok i forgot to take the pictures,
you got me.
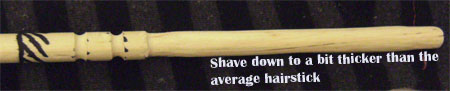
now slowly shave down the stick part until its a bit thicker than your average hairstick with the bigger rasp file thingys.
be sure to turn the dowl as you shave it down so its even... usually uneveness is hid really well by the spirals but still
try to get it as even as possible.
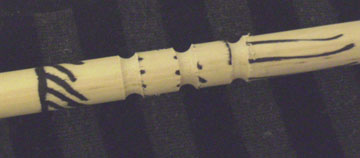
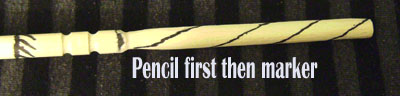
now its time to draw the spirals... make 2 dots on each side of the dowel by the top where the spirals start. make sure
they are on the exact oposite side from each other... now slowly draw the spirals one at a time with PENCIL pencil
pencil pencil. use the first spiral as a guide for the second spiral to keep them parrallel
just keep trying until you get them the way you want them.. then go over the lines in marker
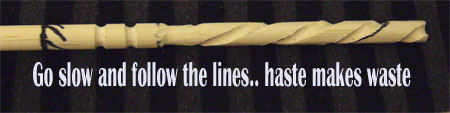
go really slow and carve out the spirals with the cylindrical rasp file thingy. go really slow with this part and dig
the spirals pretty deep. at the very ends of the spirals carve then especially deep so that when you sharpen the
stick the spirals will still be visible
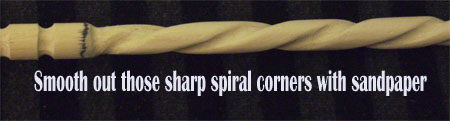
sand down the sharp corners of the spirals with sandpaper
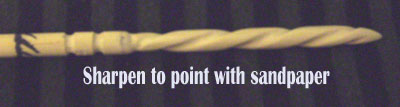
sharpen to a point with course sandpaper then smooth everything out with fine paper...
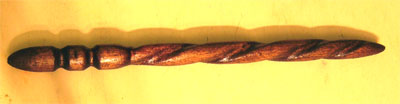
saw off the hairstick from the big piece of wood. shave down the top to be a sort of rounded cone shape and smooth
the edges of the lines we carved into the top... sand eveything with fine grit and then stain and shine up your creation the
same way as you did with the first stick under the carved hairstick 1 section of this website... here is what mine looks like...
im not too happy with it but thats what happens when you rush to get something done. sorry about forgetting to take more pics...
|